
Guide
Windows tip: how to get the old context menu back
by Florian Bodoky
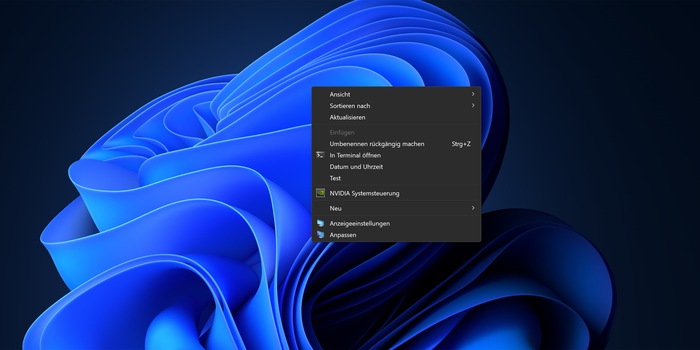
Right-clicking to open the context menu is an all-purpose solution in Windows. It’s even better and more effective if you personalise it.
Did you know that you can expand or shorten the Windows context menu? For example, you can add your own programs to it or submenus for system settings. To do this, you need to make a one-time change using the Registry Editor.
The context menu, opened by right-clicking, is powerful and practical. You can use it for files and folders, for example, to open programs, share or copy files and much more. You can also right-click on empty areas – on the desktop or in Explorer – to see a menu of other system-relevant options, for example, to open the display settings or command line. In short, context menus are practical and increase efficiency when working.
In the following example, I’ll add a program – the Windows Calculator – to the context menu. You can do the same with other programs, commands and system settings.
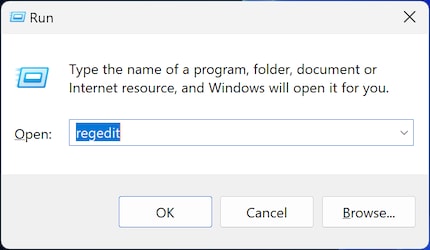

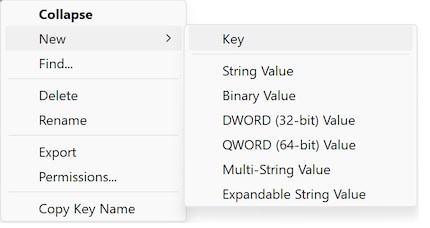
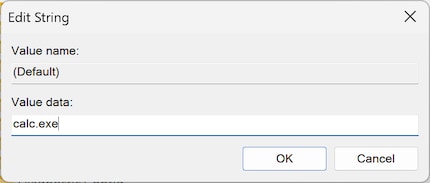
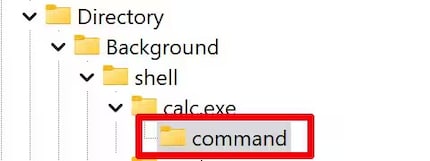

Double-click to open it. Next, enter the term «calc.exe» in the «Value data» field. If you want to insert a different program, enter the name of the respective .exe file here. You’ll find it in the respective program folder, usually under C:\Program Files or C:\Program Files (x86). Click «OK».

7a. You can also add a submenu to the system settings. This is helpful if it’s one you need often and would otherwise be forced to click all the way through to it each time. Under «command», enter the following in the «Value data» field instead of the name of an .exe file: «C:\Windows\System32\rundll32.exe shell32.dll,Control_RunDLL» – and add the Control Panel name (CPL). In my example, I added the «Date & time» setting with «timedate.cpl».
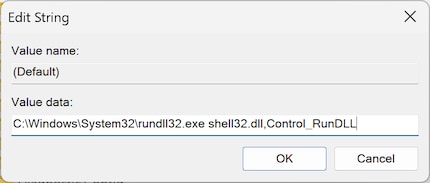
You can also add any other system setting this way. Here are some examples with their CPL names:
Note: In Windows 11, the new command is located in the context menu under «Show more options». If you want to have it at the topmost level of the context menu, you’ll have to switch to the classic context menu. Check out the Windows Tip below to see how to do that.
Just like you can add menu items, you can also delete them. Should you no longer need your custom menu items, you can simply delete the corresponding registry key under «shell». You can also delete context menu items that originate from Microsoft. For example, I never use the «Send to» item – so I’ve deleted it.
Caution:
If you’re not absolutely certain of what you’re deleting, don’t do it. Making ill-considered changes to the registry can create problems.
Here’s how to delete the «Send to» item:

[HKEYCLASSESROOT\AllFilesystemObjects\shellex\ContextMenuHandlers\SendTo] (for other items, the path after «ContextMenuHandlers» must be adjusted accordingly).
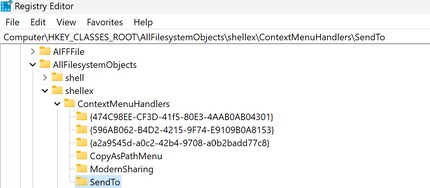
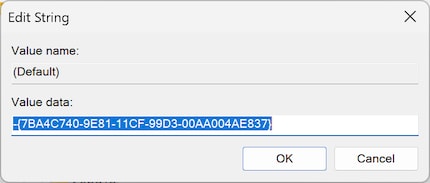
You’ll find the context menu items (SendTo, OpenAs, etc.) in the following folders:
I've been tinkering with digital networks ever since I found out how to activate both telephone channels on the ISDN card for greater bandwidth. As for the analogue variety, I've been doing that since I learned to talk. Though Winterthur is my adoptive home city, my heart still bleeds red and blue.