
How to run a Corsair RGB LED fan directly from an ARGB header
Making the impossible possible. I’ve managed to directly connect a Corsair RGB LED fan set to the ARGB header of an Asus motherboard. And all you need is a cable core that connects two pins.
The LL120 RGB fan set from Corsair includes three fans, a fan hub (RGB LED Hub) and an LED controller called Lighting Node Pro. When installed, there’s room for up to six RGB LED fans on the hub. From there, a single cable goes to the Lighting Node Pro. This in turn is connected to the USB 2.0 header of the mainboard. Here’s the thing: the fans can be operated without this controller if your motherboard has an ARGB header.
I upgraded my office PC and tried out the three RGB LED fans as part of the upgrade. They successfully lit up simultaneously in a kaleidoscope of colours, without the controller it usually needs. Now all that’s missing is artificial turf and a unicorn galloping over this proverbial rainbow.
Starting off: from old to relatively new
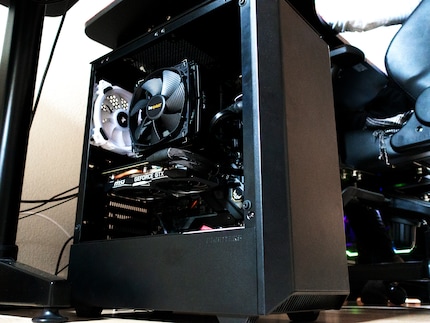
In addition to a current gaming PC primarily used by my wife, there’s a somewhat ageing former gaming PC in my office. I use it when working from home. I’ve rebuilt it several times over a decade. The only thing left from my original 2012 build is the RAM. Its board (ASUS Z87-A) and processor (Intel Core i7 4770K) are nevertheless already in their eighth year of service.
Source: Martin Jud
And now, perhaps for the last time, I’ve upgraded it. With a second-hand processor and motherboard, a new cooler and fresh RAM. As a result, the single case fan I currently have installed won’t cut it any more. And that’s where Corsair’s LL120 RGB fan set comes in, which I received directly from the manufacturer.
In case you’re interested, here are the components of my freshly refurbished office PC, now better suited for gaming.
New components
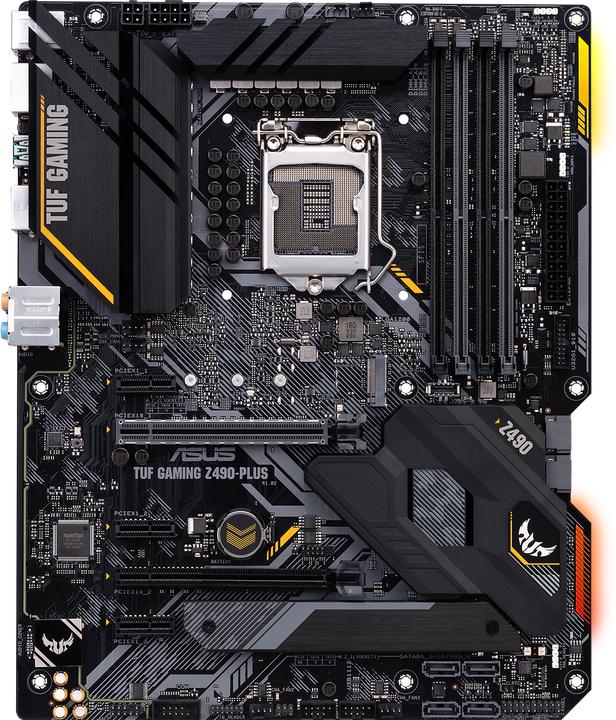
Motherboard note: due to an oversized VRM heatsink that’s permanently attached to the Asus TUF Gaming Z490-PLUS, few CPU coolers will fit on it without it getting in the way. That’s one of the reasons I chose the Dark Rock TF 2 from be quiet!, in addition to the cooling performance I need. Keep in mind, this only works because I only need two RAM banks. There’s not enough room for four, as the cooler covers some slots.
Previous components
A note on the white fans in my otherwise black build: the three-pack of RGB LED fans is naturally also available in a (perhaps) more appropriate black – here. I kind of like the fans being out of line, though.
Wiring RGB LED fan correctly
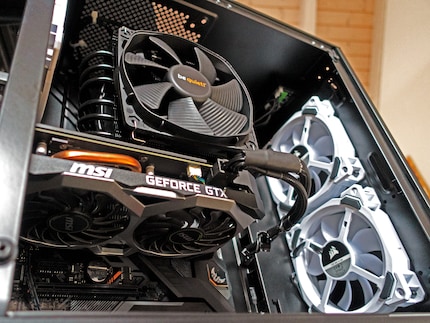
I disassembled and reassembled my old, new PC in a few hours. The three Corsair fans are attached in a few minutes. Two draw air in at the front, and one assists with pushing air out at the back of the case.
Source: Martin Jud
The fans each have two cables: one for fan operation itself and one for the RGB LEDs. I connect the fan cables directly to the board. For this, I use the three headers labelled CHAFAN1, CHAFAN2 and CHA_FAN3 (case fan connectors 1, 2 and 3).
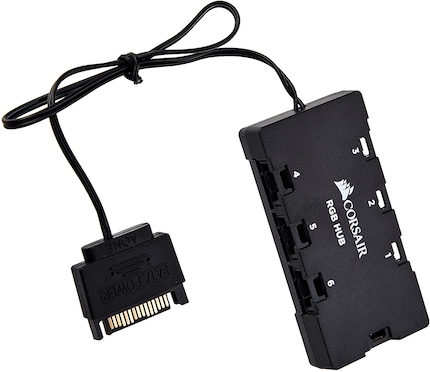
I plug the cables for the LEDs into the fan hub. It’s vital that the fans are connected to this small hub continuously starting from the first port. The LED cable connections on the hub are marked with the numbers 1 to 6. If you have three RGB LED fans, you have to connect them to ports 1, 2 and 3 – otherwise they won’t light up or only partially.
Source: Corsair
In addition to bundling cables, Corsair’s fan hub also provides power to the LEDs. It has a SATA power connector, which I connect directly to the corresponding power supply cable.
If I were to install just a single RGB LED fan, I could also do away with the fan hub and draw power directly from the ARGB connector on the motherboard. If I were to connect different ARGB LED sources to a standard ARGB LED hub without SATA power, the number of possible LEDs would be limited due to ARGB’s present specifications (3 amps, 5 volts) per connection. In the motherboard’s manual, Asus states that a maximum of 500 LEDs can be combined at the port (not to be confused with 500 RGB LED fans). This limitation is done away with thanks to the extra power provided by the hub.
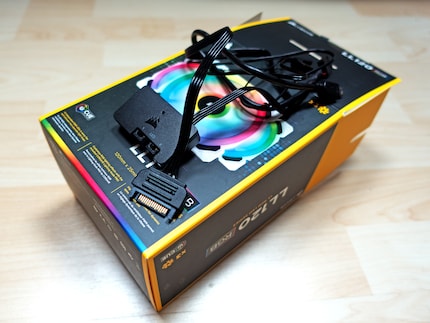
Source: Martin Jud
At this point, the Lighting Node Pro would usually come into play. It offers two inputs for fan hubs. I could run a supplied cable from the hub to the controller. That in turn would come with another cable to a USB 2.0 port on the motherboard and its power cable to a SATA power supply port – that’s the usual build.
Or I could do without the controller and use the ARGB connector called Aura Addressable Gen2 Header (ADD_GEN2) by the motherboard manufacturer.
Corsair RGB LEDs directly into the ARGB header – VERY distinct from an RGB header
ARGB (addressable RGB) is sometimes also referred to as Digital LED. Furthermore, different manufacturers or mainboards have different names for it. Where Asus installed the Aura Addressable Gen2 header on my board, MSI, for example, calls it JRAINBOW2 – it’s all the same thing (ARGB).
There’s a real risk of confusion between ARGB and RGB. RGB headers already existed before ARGB. Instead of 5, RGB offers 12 volts. Moreover, the LEDs of a fan or strips with an RGB connection can only light up in static colours. Rainbow effects are only possible with ARGB. RGB is therefore inferior to ARGB, but many boards still offer connections of both types.
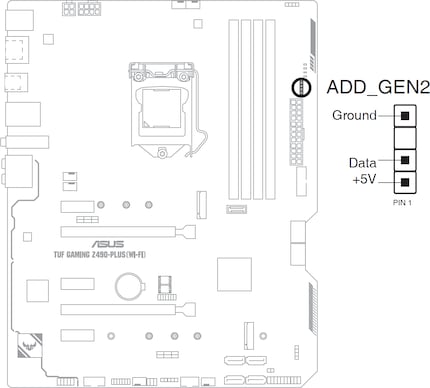
Source: Asus
Before connecting, I check a motherboard diagram to make sure I don’t get the wrong RGB connector. Annoyingly, the ARGB connector has only three pins, they’re just located over the width of four pins (4-pin footprint with the third pin missing). It’s near-identical to the RGB connector, which also has a 4-pin footprint, but actually uses all four pins. Nevertheless, there are also motherboard manufacturers that place the three ARGB pins directly next to each other. The fan connectors are accordingly only three instead of four pins wide. Still, at least some LED accessory manufacturers supply adapters with their products to enable connections to a motherboard using standard ARGB.
See? In one way or another, all manufacturers do something to confuse us customers. And on top of that, there are also LED products where both the connector and the entire product are a proprietary design. So they won’t work with either RGB or ARGB headers. And until recently, I actually thought this was the case with Corsair as well. But fortunately, this isn’t true.
Corsair’s extra controller doesn’t have to be used. However, it does provide computers without an ARGB connection access to ARGB. Because, as already mentioned, it interacts with a USB 2.0 header.
The following table shows the ARGB pin arrangements on the mainboard and the fan hub. For comparison, I’ve also included the RGB connector, which you can’t use for Corsair RGB LED fans.
| ARGB Header | Corsair RGB LED Hub Header | RGB Header
(do not use) | |
|---|---|---|---|
| Pin 1 | +5 Volt | Ground | +12 Volt |
| Pin 2 | Data | Data | Green |
| Pin 3 | No Pin | +5 Volt | Red |
| Pin 4 | Ground | - | Blue |
The hub, or the RGB LED hub respectively, has three adjacent pins, the third of which (+5 volts) isn’t used even with a regular connection to the controller. The corresponding cable has a three-pin connector, but there are only two wires for grounding and data anyway. Why there isn’t just a single data wire running from the hub to the controller is beyond me. Since the SATA power connector itself also already has a connected ground wire, a second one seems superfluous.
Anyway, all I need to do for this project is to connect the two data pins from the hub to the mainboard. I recommend you use a jumper cable for this, sometimes called a wire jumper plug or DuPont in stores. The cables are available with two male, two female or one male and female connector. My present purpose calls for one with two female ends.
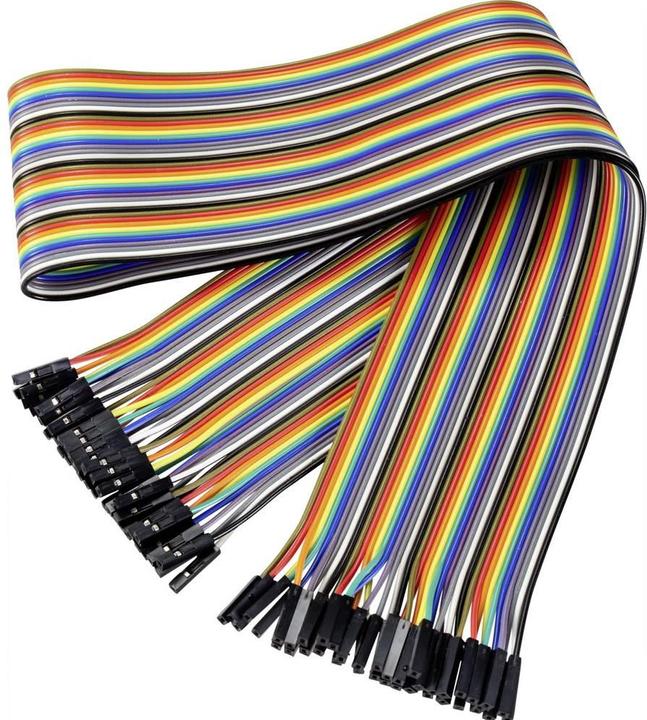
Renkforce Wire bridge socket - wire bridge socket 60 cm flat cable
Stupidly, I only have cables with male and female plugs at home. Thankfully, my search for a better cable leads to me finding some jumpers in a random box. They’re cables made to connect two pins on a board. This allows me to turn two of my cables into one with two female connectors.
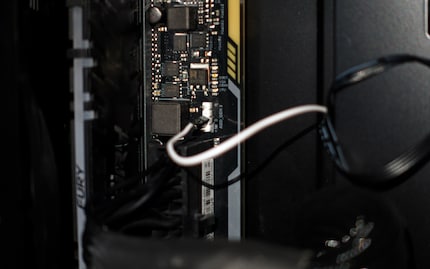
Only after doing this do I find another way that doesn’t require an additional cable. If you grab the cable that comes with the fan set, the one meant for the connection between a hub and controller, you can plug it onto the ARGB header in such a way that only the middle data pin connector is linked to the ARGB data pin. Just please make sure the grounding wire doesn’t accidentally end up on the +5 volt pin of the ARGB header. If you want to be on the safe side, you can cut the outer ground wire with pliers before connecting it.
Behold, my creation featuring the additional cable before a first test:
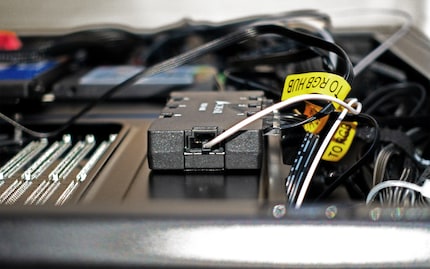
Source: Martin Jud
Source: Martin Jud
And… Action!
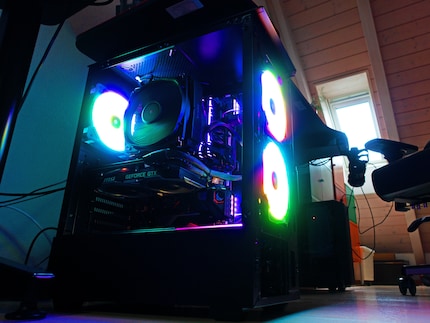
Fortunately, everything worked out. My three fans give it their all, lighting up in all the colours of the rainbow. There’s no real advantage over Corsair’s installation using a controller. I save on material, but it’s already been produced anyway and is included with the set.
Source: Martin Jud
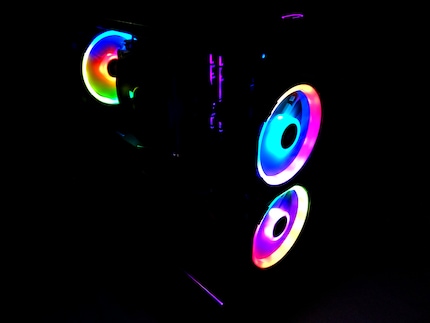
Similarly to the fact that white fans don’t really mesh with everything else, RGB LED lighting basically doesn’t fit my case either. Since the front cover features neither a mesh nor glass, I can’t directly admire the front two fans with the case closed. Still, they sparkle mysteriously from the upper and lower vents in the evening. And at least I have a direct view of the RGB LED light show on the rear fan, thanks to the side window.
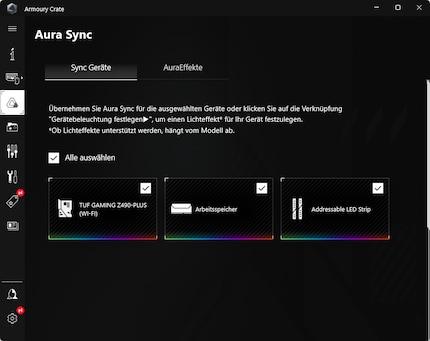
To adjust the effects of my ARGB LEDs, I can use any software that can control ARGB. I can choose between Corsair’s iCue or Asus’ Armoury Crate software. The same applies to fan speed control.
Source: Martin Jud
Finally, I decide to use the Asus software. I don’t really like either program, as they seem overloaded and take some getting used to. However, I like the Asus Aura light effects a bit better.
Source: Martin Jud
As for the fan performance, I’m happy with the RGB LED sparkle. After some testing, I use the Quiet fan profile. This way, temperatures inside the case are only a few degrees higher than with the Normal profile, even at full load. And yes, the PC remains really quiet throughout.
Header image: Martin JudCorrection: In a first version of this article, online for a few hours on January 19, 2023, I suggested connecting the ground pins as well. Since this isn’t necessary, I’ve revised the article accordingly.
I find my muse in everything. When I don’t, I draw inspiration from daydreaming. After all, if you dream, you don’t sleep through life.


