Oxocard Connect: building and programming your own electronics
The Oxocard Connect is a programmable minicomputer you can hook various modules up to. This allows you to learn the basics of electronics in a fun way.
After Oxocard Mini now comes Oxocard Connect. Suitable names could also have been Oxocard Micro or «Mini Mini», because it’s considerably smaller than the Mini but has a lot in common with it. They’re both simple minicomputers by Swiss manufacturer Oxon and provide a fun way to learn how to programme. The card connects via Wi-Fi to your PC or Mac, where you work in a web-based editor. It contains many examples and tutorials you can try out and modify to suit your own purposes. Keep reading to find out the basics of how Oxocards work.
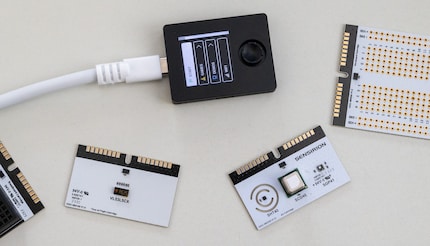
It’s not the smaller dimensions that make the Oxocard Connect so special. It’s that you can connect it with cartridges. Similar to old game consoles, you insert a cartridge module to expand the Oxocard.
Source: David Lee

Source: David Lee
The Oxocard Connect offers the minimum necessary hardware, i.e. primarily a processor and a screen. Hardware that’s only needed for certain applications, for example measurement sensors, is located on cartridges. This makes it optional and interchangeable.
Each cartridge has a small memory containing a script that starts automatically when you insert it. You can either modify this script or fully replace it with one of your own. This means you can use the Oxocard Connect without being connected to a PC.
The new cartridge system is open source, as are the individual cartridges, including the firmware. Anyone can download the connection diagram and make cartridges themselves. You can also screw cartridges onto the Oxocard. The cartridges’ firmware is open source, too.
To get started, however, it’s a good idea to buy a cartridge. Manufacturer Oxon offers four of them so far.
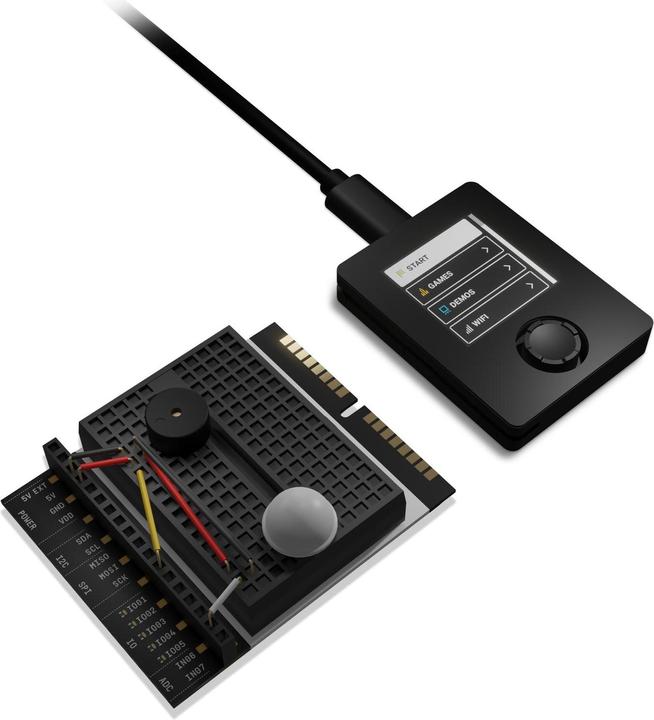
- Breadboard: for plugging in electronic components. You can physically test out the circuits without having to solder them. That’s particularly handy for experimenting.
- Veroboard: requires soldering.
- Air: provides sensors for measuring temperature, humidity, carbon dioxide content and other air components.
- ToF (time of flight): measures the distance to the nearest object using a laser. The sensor can measure not only one point, but a field of 8×8 points.
You can buy the breadboard separately or as part of the Innovator Kit, which probably makes more sense if you’re a beginner. In addition to the plug-in board, it contains numerous connecting cables, resistors, LED indicators and other components, as well as the actual Oxocard. In other words, it’s a complete set.

Just the Oxocard Connect
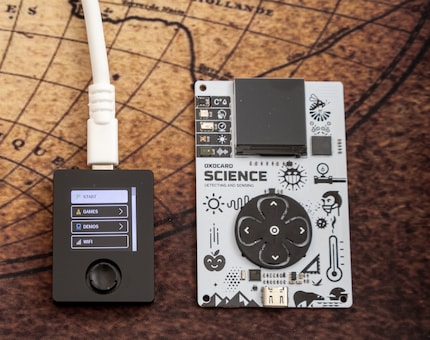
First, I try out the Oxocard Connect without using cartridges. It’s housed in a case, unlike the Oxocard Mini, which has an exposed board and components. Both have their appeal; visually, I like them both.
Instead of directional keys, the Connect’s equipped with a mini joystick. This saves space – the Mini’s buttons alone are almost as big as the entire Oxocard Connect. However, I find the joystick trickier to use than the big buttons. Time and time again, I accidentally navigate one way when I want to press OK or vice versa. Although I get the hang of navigating through the menus over time, the joystick’s too fiddly for games.
Source: David Lee
The programming language, which used to be called Oxoscript, is now called NanoPy on both Oxocard models. Accordingly, the programs for the Mini also run on the Oxocard Connect. Basically, all sample programs are available in the web-based editor, regardless of which Oxocard you’ve purchased.
Depending on the version, the Oxocard Mini has a built-in speaker or various measurement sensors as well as an accelerometer. The Oxocard Connect has none of this. This means the cards aren’t one hundred per cent compatible with each other, though many of them are. The processor dual-core ESP32 is the same, as is the square screen with a side length of 2.5 centimetres and 240×240 pixel resolution.
The USB-C port is located on the top of the Oxocard Connect and on the bottom of the Oxocard Mini. To keep the display with its gooseneck cable from being upside down, you can rotate it by 90-degree increments in the settings.
Air Cartridge: measures what’s in the air
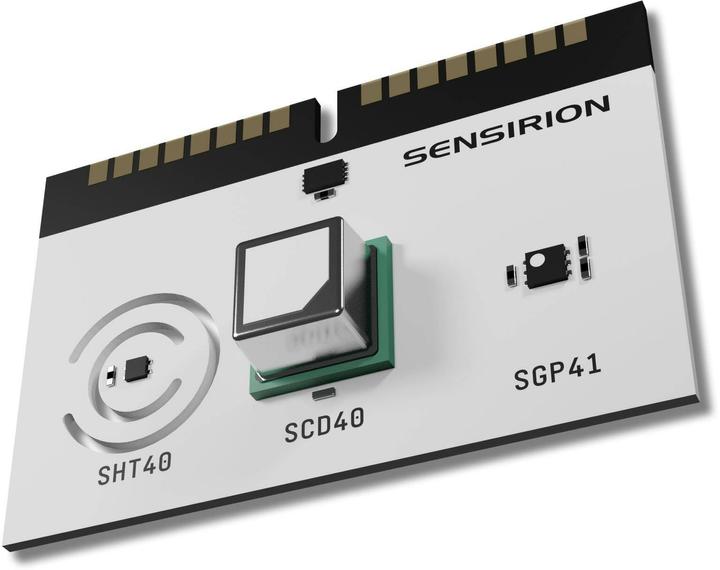
Now for the exciting part, the plug-in modules. First up, I try out the Air module. This plug-in module contains sensors for measuring air quality, temperature and humidity. This retrofits part of what the science version of the Oxocard Mini offers. The latter can measure other things including brightness or sound frequencies.
In return, the sensors on the Air cartridge are said to be very high quality. So you can expect a high level of precision. The sensors are from Swiss manufacturer Sensirion. As they’re calibrated ex-factory, the measured values should be correct from the start. Although I can’t verify this, the displayed values look plausible.
I try out the various sample programs. This works perfectly – even when I remove the cartridge during a running script and insert another one. What happens is that the program’s stopped and the autostart script of the new cartridge is started. This script is stored directly on the respective cartridge and can also be changed.
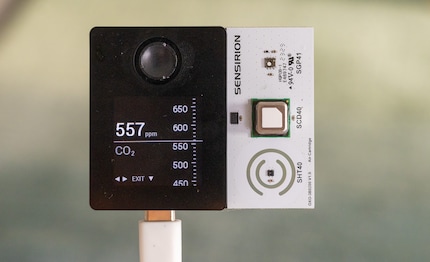
The Air launch program is nicely done. It displays the current measured values on a scale and as a large number: carbon dioxide, nitrogen oxide, VOC content (link in German), temperature and humidity. Fun fact: the temperature program of the Oxocard Mini Science also runs when I plug in the Air.
Source: David Lee
Unlike many sample programs, there are no tutorials explaining the programs here (yet). However, the Air-specific program commands are described in the documentation. So I probably wouldn’t have any problems writing my own program that uses the cartridge’s sensors.
ToF: distance measurement and 3D camera
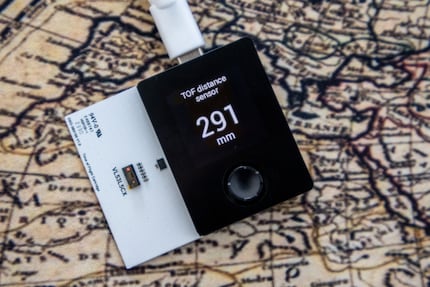
ToF (link in German) is the abbreviation for time of flight, which is a way to measure distance. A light or infrared beam is emitted and a sensor detects when it’s reflected. The distance can be calculated from the time it takes the laser to travel there and back.
The cartridge’s ToF camera doesn’t just detect a single point, but covers an angle of view of about 65 degrees. Anything that falls within the viewing angle is resolved with 8×8 pixels. In other words, it’s a 3D camera – albeit one with an extremely low resolution.
If it’s pure distance measurement you’re after, the viewing angle is a bit annoying. Why? Because you have to make sure there are no obstacles between the sensor and the object within this angle. On the plus side, the angle is very practical for 3D imaging. As the whole thing happens in real time, it can be used to recognise simple gestures. A sample program can tell if you’re swiping your hand to the left or to the right.
So far, there are no tutorials for the sample programs on this cartridge either. However, the commands are well documented.
Source: David Lee
Breadboard and Veroboard: your own electronic extensions
Do you want to use other sensors than the ones on the Air and ToF cartridge? Or maybe you aren’t using any other components at all? That’s not a problem as long as you’re willing to put a bit of work in. That’s what the breadboard and Veroboard cartridges are for. They allow you to create circuits and components according to your own ideas.
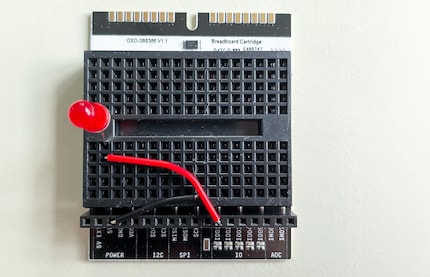
The breadboard is a plug-in board; no soldering required. If you’ve got a connection wrong, you can easily pull it out again and reconnect it. The breadboard is great for testing and experimenting. It basically has an undo feature, which is usually missing in the physical world.
You can also use breadboards with other systems such as the Arduino. A starter kit containing everything you need is also available for this purpose. I’m not familiar with the Arduino kit yet, so can’t make a comparison.
The Veroboard is a solder board, the advantage being that soldered parts are more stable than plugged in ones. On the other hand, things are more difficult to undo. I’ll save the Veroboard for later, because I’m an electronics novice and don’t really know what I’m doing yet.
Electronics for newbies – or maybe not?
A breadboard like this is also a great way to access the world of electronics. Especially with the Innovator Kit mentioned at the beginning. It contains everything you need to get started. There are quite a lot of example programs in the editor available for the breadboard. One part is called «electronics course». These scripts include tutorials. Sounds promising.
The course begins with the «Hello, World!» program of electronics: making an LED light up. A photo shows you which cable connections and other components need to go into which holes. There are also connection diagrams for the examples, but as an electronics beginner they’re not much use to me. But thanks to the photo, I manage to make the LED light up in the first attempt. It’s easy to have your first sense of achievement.
Source: David Lee
Afterwards, I learn a few things about the experiment. I think that’s very important in a course. Personally, however, I think the wrong things are being explained. I learn what an LED is, what it’s used for, and how to calculate the resistance for the LED. The code and the plugged connections, on the other hand, aren’t explained. As a beginner, I still don’t fully understand what I’ve done. I particularly feel left in the dark about what the three connecting cables do, whether I could plug them in elsewhere, and if so, why.
It’s pretty much the same with the second example. The diode now only lights up when you press a button. This makes the circuit somewhat more complicated. Again, I succeed in rebuilding it without any problems. And again, I don’t fully understand what I’ve just done – despite the explanations.
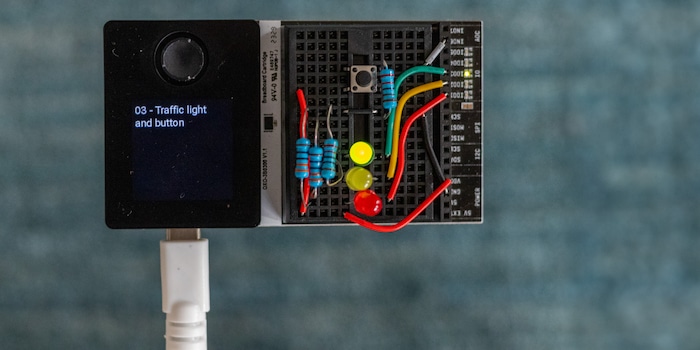
In the third example, I build a traffic light consisting of a red, a yellow and a green LED. It takes me a long time until all diodes light up correctly. I finally succeed by unplugging the green diode from the board and plugging it in again.
The next step is obviously a traffic light with a button. If a pedestrian presses on it, the traffic light switches to red for the cars before turning green again.
The Innovator Kit contains numerous other electronic components. For example, a potentiometer, a servo electric motor, a motion detector and a temperature sensor. The electronics course also contains programs for these components. This gives you many possibilities at once. But before I try them all out, I want to understand how the connections work on the breadboard.
Conclusion: good idea with a lot of potential
I’m sold on the basic idea of the Oxocard Connect. The card itself only offers a minimal hardware configuration, and you can upgrade everything else with modules. Either ready-made or according to your own idea. This makes the card versatile, flexible and powerful. Only the fiddly joystick bothers me a bit.
I love the Innovator Kit! The extensive set contains everything you need to create your own electronic circuits and includes many interesting components.
My only criticism is that the basics aren’t explained if you’re a beginner like me. i.e. how the plug-in board is constructed and what the basic rules are for the cable connections. The explanations provided in the electronics course still feel a bit half-baked. Having said that, Thomas Garaio from Oxon wrote to tell me there’s more to come.
But if you have the know-how and are up for creating your own circuits or even a completely custom cartridge, you have everything you need at hand with the kit. For everyone else, there are still a few entry aids missing, as are more ready-to-use cartridges. But that will soon change. More modules are already in the pipeline. Since the whole thing is open source, third parties can join in and users can share ideas with each other. In any case, the Oxocard Connect has great potential.
My interest in IT and writing landed me in tech journalism early on (2000). I want to know how we can use technology without being used. Outside of the office, I’m a keen musician who makes up for lacking talent with excessive enthusiasm.
