
Guide
Why I’ll lubricate my linear switches in breast milk cups from now on
by Kevin Hofer

In this post, I'll explain to you how a mechanical switch is constructed.
Linear, tactile or clicky - the three primary switch types offer different typing experiences. But there are also differences within one type. This is due to the components used.
A mechanical switch, as installed in most keyboards, is based on five components: stem, spring, upper and lower housing parts, and contact blade. The stem is the part that moves up and down inside the switch. It is attached to a spring that returns it to its original position. The stem moves between the upper and lower housing parts. The upper part is plugged onto the lower one. The lower part houses the contact blade. This is the metal part that closes the electrical circuit and registers the keystroke.
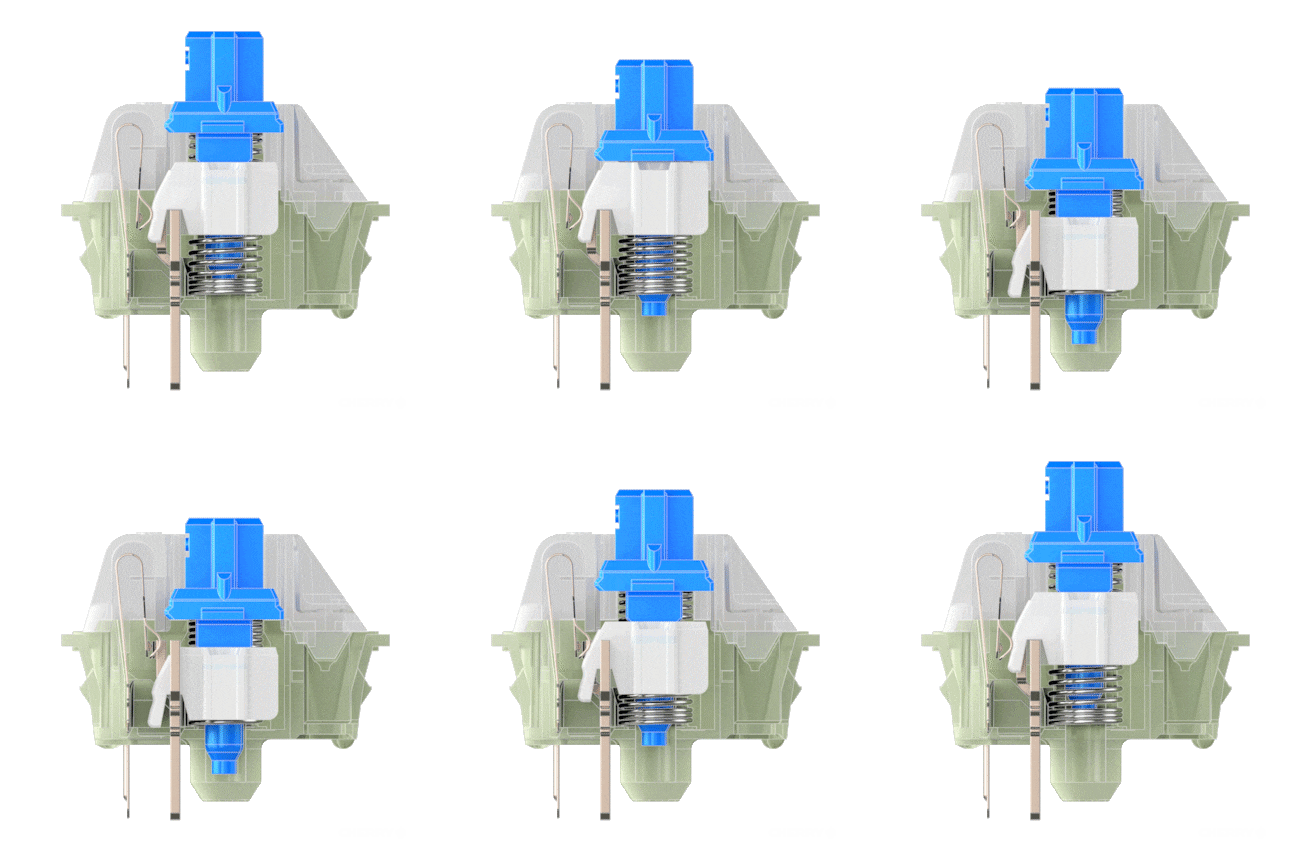
On the bottom of the lower part of the case, there are also the pins that make contact with the keyboard's circuit board. Here is an animation that illustrates the whole thing using the three switch types:
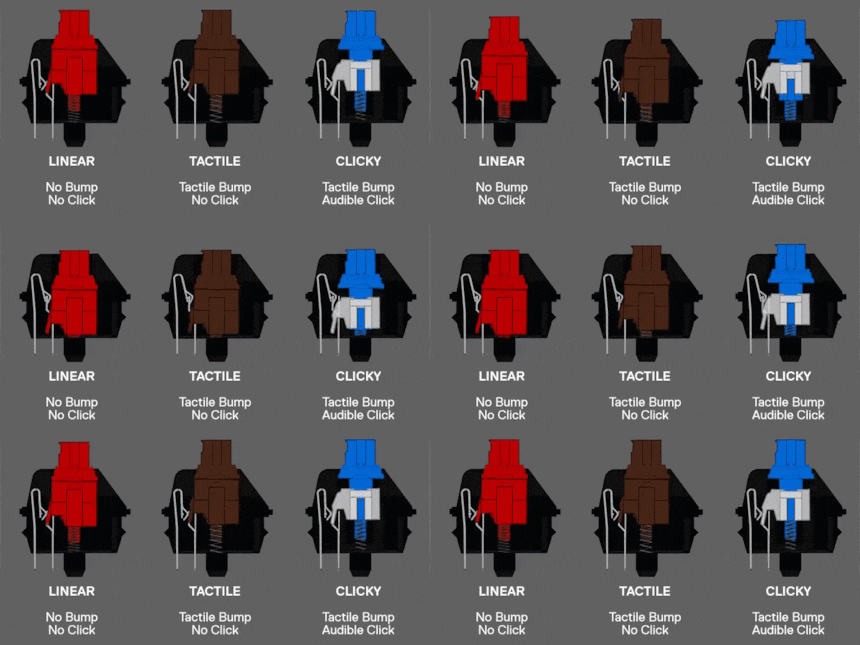
The stem is the most important element of a switch. Because it makes it linear, tactile or clicky. In the following picture you can see the most important elements of the stem.
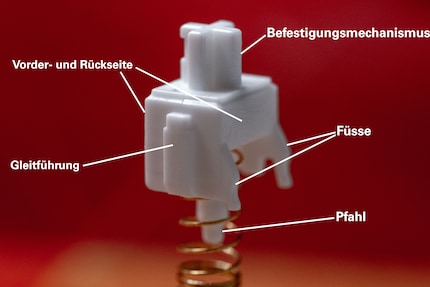
Again, the most important element of the stem are the feet. These are two symmetrical protrusions in the front. They trigger a keystroke when they come in contact with the metal blade. In a linear switch, the feet are straight and smooth. A tactile switch has an elevation. This is where the English term tactile bump comes from. The larger the bump, the stronger the tactile bump. When pressed, the bump can be long or short and crisp.
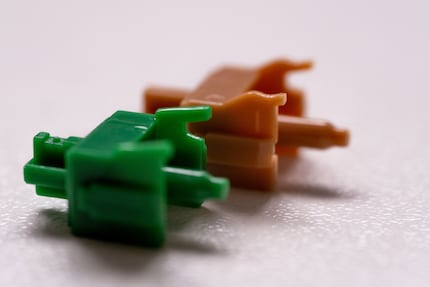
The feet of clicky switches are clearly different from those of linear or tactile switches. They can be divided into the types click-jacket and click-bar. Here is a picture of a click-jacket stem:
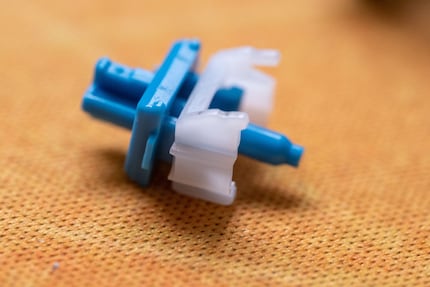
This is divided into two parts. The blue part consists of the mounting mechanism and the pole. The white part, the actual Click-Jacket, consists of the feet. Like the tactile feet, these have an elevation. When you press the switch, the Click-Jacket jumps down after contact with the blade, which creates the click sound. Here is the animation of a Cherry MX Blues:
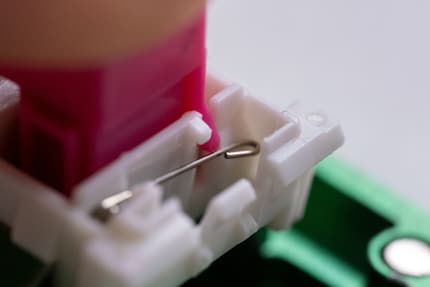
With the click-bar switch, the stem consists of one piece. In the example of the Kailh Box Pink, the Click-Bar is located on the back of the lower part of the case. This is pressed down by a foot on the back and produces the click sound when it springs back.
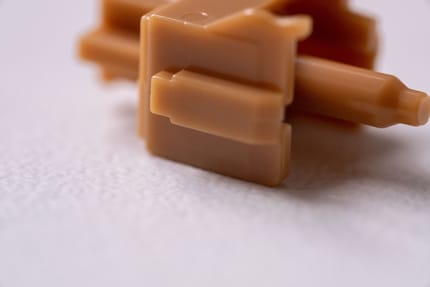
On the side of the stem are the sliding guides. They guide the stem vertically towards the bottom. This is where there is the most contact with the other switch components and thus the greatest potential for friction. If a switch feels scratchy when pressed, this is mainly due to this.
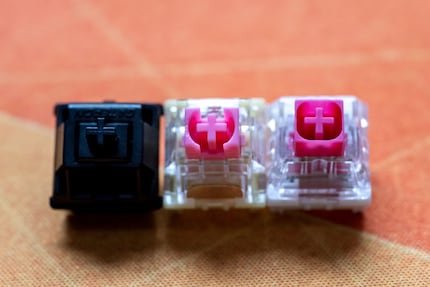
At the top is the mounting mechanism. On an MX-style switch, this is indicated by the shape of a plus (+). In BOX switches of Kailh or dust-protected MX switches, the plus is completely or almost surrounded by walls. Nevertheless, these switches are compatible with MX keycaps. However, there are other mounting mechanisms, for example with low-profile or Alps switches.
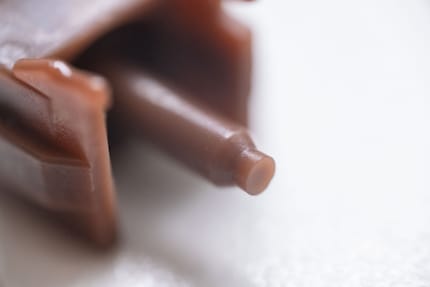
At the bottom of the stem is the stake. This helps the stem stay centered when moving up and down. The length of the pile determines how large the total key travel of a switch is. With a longer post, the key travel is shortened, so you press the switch faster.
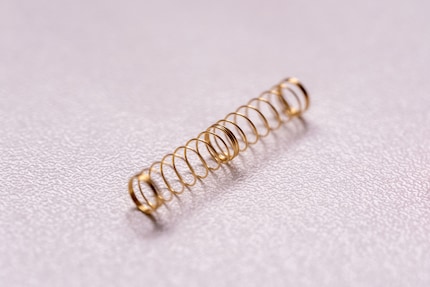
The spring is the second most important element for the typing feel after the stem. It determines the operating and release force of a switch. And thus how hard the keys can be pressed.
Among other things, the material, its coating, the distance between the coils, the distance between their end coils or the length determine how a nib affects the typing feel.
Basically, a distinction is made between two types of springs: linear and progressive. With linear springs, the force required increases linearly the more you compress them. With progressive springs, the required force increases more. So, compared to linear springs, the force required for the same spring length can be 100 grams of force instead of 75 grams.
Today, there are also springs that combine the two types. For example, they start out linear but then switch to progressive. So-called two-stage springs, which are supposed to make pushing down more even and jumping up more powerful, are also currently in vogue.
The upper housing part as well as the lower housing part hold the Switch together. The upper one is mainly characterized by four elements. In the middle is the hole for the stem. This hole looks the same on most manufacturers. It is almost rectangular on all of them. However, manufacturer Kailh uses square holes for its box switches.
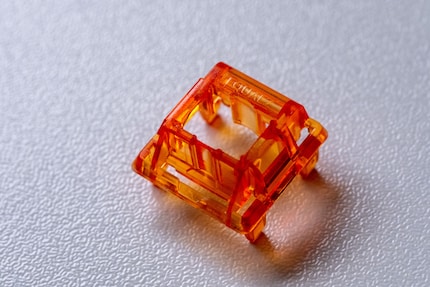
Another hole is located in the front. The LED shines through this one if your keyboard's PCB has RGB per key.
On the opposite side of the LED hole, the manufacturers usually immortalize themselves with their name. This can be one of the big switch manufacturers like Cherry, Gateron, Kailh or Outemu. In the case of contract manufacturing, the name of the client may also be on it. Sometimes there is no name at all.
The fourth element is the feet. They protrude from the bottom of the upper part of the case and hold it together with the lower part. There are two different types of feet: those with four narrow feet and those with two wide feet. However, their function is the same.
The lower housing part houses the contact blade at the back. In the front, as with the upper housing part, there is a hole for the LEDs. In the middle is the hole for the stem's post. On the side are the sliding guides for the stem.
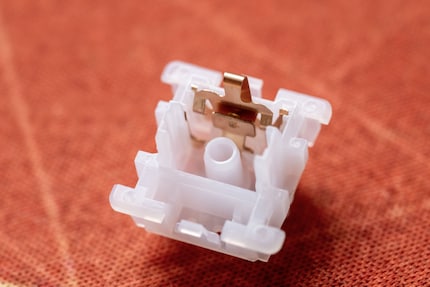
As with the upper housing part, there are slight differences in these elements depending on the manufacturer. On the lower housing part, the difference is whether a switch is for PCB mount or plate mount. A PCB mount switch has five pins that contact the PCB, a plate mount switch only three. Only the two metal pins are responsible for the communication with the board, the others help to fix the switch. PCB-mount switches can be mounted directly on the board. Plate-mount switches require a switch plate in any case.
The metal contact blade consists of two parts. When the stem slides down, the feet of the stem press the two metal parts together. This closes the circuit and triggers a single keystroke.
The two metal parts are inserted through the bottom housing of the switch and protrude out the bottom. These pins contact the keypad circuit board and form the electrical circuit when the switch is pressed.
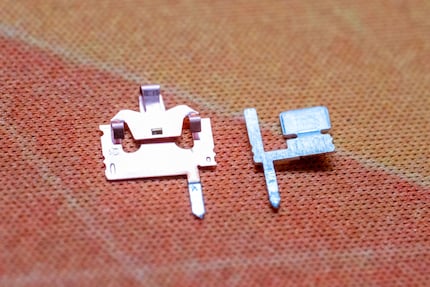
The larger part of the contact sheet is placed further away from the stem. The smaller part in front of it.
Actually I wanted to explain you already in this part of the small switch lore, how different materials affect the switch. But since this article is a bit long, I will explain this in the next part.
From big data to big brother, Cyborgs to Sci-Fi. All aspects of technology and society fascinate me.
Practical solutions for everyday problems with technology, household hacks and much more.
Show all