
Background information
Why I’ll be taking holiday photos on film from now on
by Samuel Buchmann

I want to see my photos on paper and fall down the rabbit hole of fine art printing. In part one of this series, I take a close look at two A2 printers and critically examine whether they’re worth the effort.
Printed photos leave an impression. They mercilessly reveal every flaw in a shot. I’m prouder of successful photos and look at them more often. I noticed all of this while taking analogue photos on a trip last year. The prints felt more important than endless digital images on hard disks – they were tangible.
But the nerd in me was unhappy with the quality of prints. Fine structures were blurry and the pictures had a particular tinge. I feel the same when I have digital images printed by online providers. They almost never look the way I imagined they would. If I hang them up in my sunny living room, they also fade quickly.
For more quality and control, I have to print myself – properly. But is it worth the effort? In this three-part series, I’ll accompany you down the rabbit hole of fine art printing. First off, basics and printers.

The pretentious term generally denotes high-quality printing with long-lasting ink on high-quality paper. A photo on cheap glossy paper from a four-colour 300-franc multifunction device isn’t a fine art print. Marketing that claims this is nonsense.
Here’s what characterises a good fine art print:
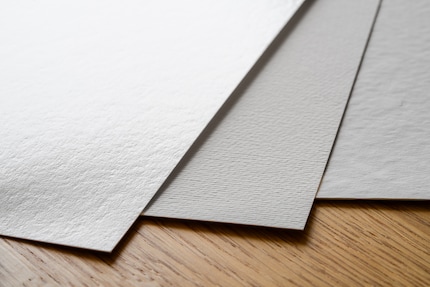
Whether you need all this depends on the purpose of your prints. If you just want to slap a snapshot from your vacation on the fridge, you don’t need fine art quality. The situation changes if you want to exhibit, sell or archive your photos. Here, only the best is good enough, and pictures must be long-lasting.
Photo printers with pigment inks are few and far between. Epson and Canon have a firm grip on the market. For professionals, there are devices from both manufacturers that can be used to print huge photos. For example, the Epson SureColor SC-P9500 can print from a roll-on 112 centimetre wide paper.
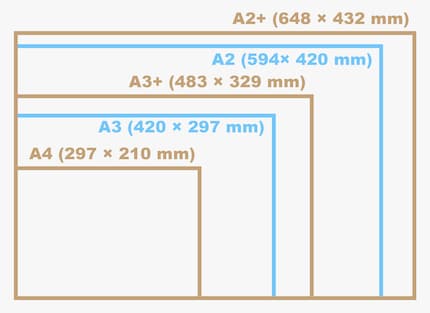
Such large-format printers are too bulky for home use. Here you’d want appliances that still fit on a table. From Epson, these are the SureColor SC-P700 and SC-P900. From Canon, the imagePROGRAF PRO-300 and PRO-1000. The smaller models can print on paper up to A3+, larger ones up to A2+. Epson can also print on a roll – up to a width of 32.9 cm (SC-P700) or 43.2 cm (SC-P900). For the latter, you’ll need to buy a roll unit separately.
As fine art printers are a niche product, development is slow and innovations are rare. Product cycles last much longer than with other technical devices. The Canon PRO-300 and Epson’s current models were launched in 2020 and are therefore considered relatively new. The Canon PRO-1000 is already eight years old, which doesn’t automatically make it worse. However, it could soon have a successor.
As an experiment, I decide to compare the two A2 printers myself? The additional space required compared to the A3 models isn’t a deal breaker. Having a larger maximum paper format outweighs this drawback. I usually print in A3+, which is well suited for pictures in 3:2 format, but I want the A2 option for hanging pictures. Here’s an overview of the most common print formats for fine art paper:
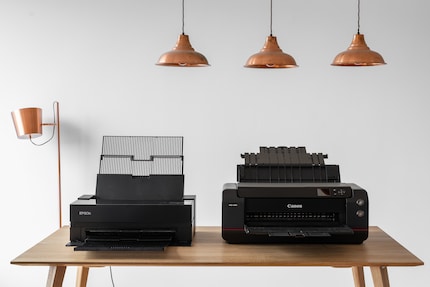
I can tell the difference between the Epson SC-P900 and the Canon PRO-1000 even before unboxing. The Canon printer is a 32-kilogramme beast. The box is also so bulky that I can’t possibly carry it on my own. At 15 kilogrammes, Epson’s model weighs less than half that and can be moved to another location without assistance. Despite the same print format, the SC-P900 is also much more compact, saving space on the table.
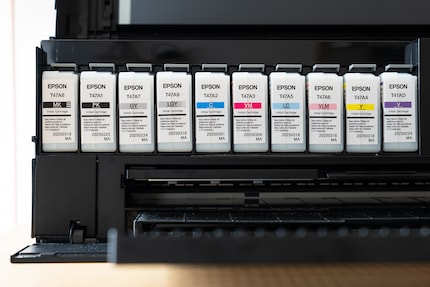
With fine art printers, you can’t hope for plug-and-play. It takes over an hour to set up. Ten different ink cartridges have to be shaken up and inserted in the Epson, up to twelve for Canon. This is followed by software installations and initialisation processes. At least there’s detailed digital instructions from both manufacturers. The Epson ones are better illustrated.
After installation, the real work starts. I curse and rage at the confusing settings. I need the right driver, the right colour profile for my paper, the right Photoshop settings and the right printer settings for everything to work correctly. Yes, these are all different things. When printing for the first time years ago, I was completely overwhelmed. I won’t go into the settings in detail in this article, check part two for that.
The good news about both printers? They deliver fantastic results with the right settings. I’d describe them as equivalent. In a blind test, I’d never be able to guess which print came from the SC-P900 and which from the PRO-1000. The colours look brilliant on both, and I can make out the finest structures as long as the source material is good enough. Printing pictures of this quality at home is so much fun.
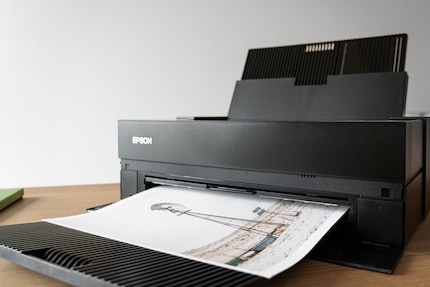
There are a few minor differences in handling. Epson has made progress here. The predecessor model SC-P800 required switching out the black cartridge when changing from matt to glossy paper. This was annoying and cost valuable ink because the black channel in the print head was flushed out every time. The SC-P900 finally has separate channels for the two cartridges – just like the Canon PRO-1000. Epson has also made improvements to the feeder. It now positions the paper centrally and no longer constantly jams, as was the case with the SC-P800. This is another problem the Canon PRO-1000 never had.
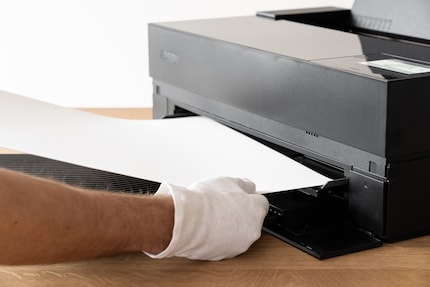
During my test, the printers reliably used paper up to 250 g/m² via the top feed. From 300 g/m², there are imperfections with both. Manual feeding is recommended for such thick paper. Here, the Canon PRO-1000 is much more user-friendly. I can push individual pages as far as they’ll go into a deeper feeder on the back before the printer takes over. With the Epson SC-P900, I have to pull out a carriage at the front and thread in the paper – a fiddly affair. After confirming via the touchscreen, the printer moves the paper to the final position and I have to close the carriage again. Only then can you get started. If you use a lot of heavy paper, you’ll get annoyed with the cumbersome process over time.
Before you run out and buy one of the two printers, you should be aware of additional costs. Fine art printing is expensive.
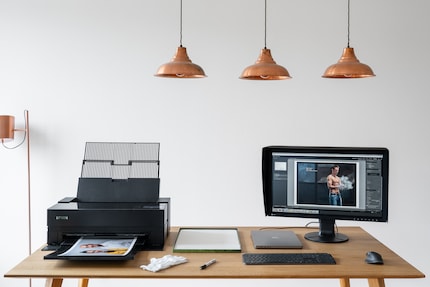
In addition to the printer, you need a good monitor. Without one, you can’t evaluate images properly and will waste ink and paper. The screen should cover the AdobeRGB colour space as completely as possible and display it correctly. Your best choice will be a specialised device like the Eizo CG2700X, which I also use for my test. Good alternatives are available from BenQ, Asus or Dell.
As a minimum, you should calibrate your monitor with a colorimeter such as the Datacolor Spyder X Pro. In order for you to properly assess finished prints, the light at your workplace also has to be right. You can get expensive standardised lamps for a truly colour-accurate workflow, but you don’t have to go that far. Even a lamp with a good CRI value can help. Another useful accessory is cotton gloves to avoid any fingerprints smudging your fresh pics.
Ink is really expensive. A set of cartridges from Epson costs 400 francs for a total of 500 millilitres. Canon charges 600 francs for 960 millilitres. How many photos you can print with it depends on the size, paper and print quality. According to tests, you use an average of around 2 francs worth of ink for one A3+ format picture. If you only print a few images at a time, a lot of ink is used for cleaning.
Then there’s the paper. Cheap Epson and Canon stacks cost 1 franc per A3+ bundle, perfectly fine for short-lived prints. But acid-free fine art paper such as Hahnemühle Photo Rag costs four times as much – and is worth the price if you want a print to look particularly good and last a long time.
Another cost factor – rejects. Not every print works straight away. In what must’ve been fits of mental instability, I’ve already selected the wrong colour profiles or printed an A4 image on A3 paper. And even after assessing the image on a true-colour monitor, a print can sometimes appear too dark or otherwise not to my liking. I estimate the total cost per successful print as follows:
It’s also important to consider space required. A printer alone takes up half an office desk. The length of the pull-outs at the front and rear shouldn’t be underestimated. The lighter Epson SC-P900 can be folded up compactly and stored away if you only use it rarely. When printing, you also want to preserve space on the table for an open box of paper, as it’s best to load heavy printing material piece by piece.
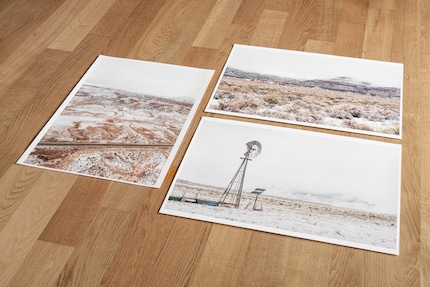
You have to be able to display finished prints somewhere. This requires a particularly large space if you want to view several images side by side. If they’re part of a series, for example. A location with plenty of daylight is best, like a dining table by the window. Prints for storage should be neatly sorted in boxes. These will also pile up over time – and don’t belong in a damp cellar. Inks and paper feel most comfortable at constant temperatures around 20 degrees Celsius and a humidity around 40 per cent.
As you can see, it takes considerable effort to print high-quality images yourself. Financially, this only makes sense if you do so regularly. Otherwise, the purchase costs are hardly worth it and you waste a lot of ink cleaning the print head. For a few fine art prints a year, it’s better to take your photos to a professional print shop. The disadvantage of going to a professional – it’s a hurdle every time, and you give up some control.
As a hobby photographer, I look at the question more philosophically. Is fine art printing so much fun that it’s worth the pain? I haven’t yet found an answer in my case. The joy I get from successful prints is great. However, I don’t really know what to do with them. Hang them up? Yes, but at some point my walls will be full. Give them as gifts? Yes, but only if the person actually values them. Store them? Yes, but only if someone eventually looks at them later.
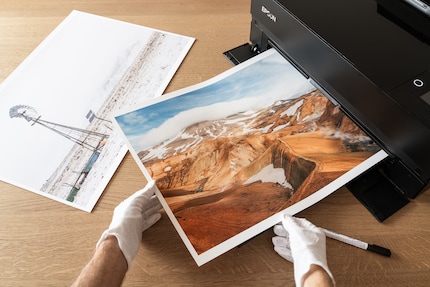
The fun of large-format printing is offset by the high space requirement in addition to the costs. A device like the Canon PRO-1000 would clearly be too big and too heavy for me. The Epson SC-P900 is easier to cope with. I can’t say whether it’s prone to faults due to its lighter construction following my short test period. I didn’t notice anything negative. I don’t see any differences in print quality either – it’s excellent with both printers. Epson’s smaller ink tanks seem to be more suitable for me as an occasional printer, and I only need ten instead of twelve with Canon. For me, the SC-P900 therefore wins in the comparison.
In the next part of this series, I’ll introduce you to the topic that probably scares off most hobbyists – print settings and colour management.
My fingerprint often changes so drastically that my MacBook doesn't recognise it anymore. The reason? If I'm not clinging to a monitor or camera, I'm probably clinging to a rockface by the tips of my fingers.
Interesting facts about products, behind-the-scenes looks at manufacturers and deep-dives on interesting people.
Show all