
Background information
Is a four-inch smartphone too small?
by Martin Jud
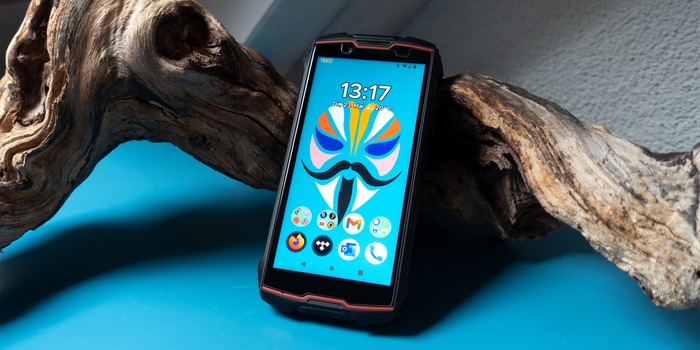
My smartphone is officially only available with Android 11. So I manually installed Android 13. Now rooting becomes the icing on the cake. Because some very special apps can only be used with administrator rights.
Since I really wanted a small and inexpensive smartphone, I’ve used a Cubot KingKong Mini 2 Pro for a few months now. It cost me under 100 francs/euros – and initially some nerves too. I had to get used to the small keyboard resulting from the four-inch display. And the outdated Android 11 was a thorn in my side. Since the manufacturer didn’t promise an update to a newer version, I installed Android 13 myself.
And now comes the icing on the cake. I’m rooting my phone. This is equivalent to administrator rights in Windows. With a rooted smartphone, you can use apps that require full read and write access to the file system. This opens up a new world for you, denied to other smartphone users.
If you want to know how I’ve been doing with my microscopic phone so far, check out the following articles. And no, I don’t just address whether four inches is enough. You’ll also learn how I removed the device’s warranty in one swift motion, all to install a custom ROM called LeaOS.
If you use apps with root access or parts of the root manager Magisk, you can benefit from several additional features. One of the most practical is automated recording of all phone calls without compromising on quality. An illegal act in this country (!) if your conversation partner isn’t aware that they’re being recorded. Better stay away from that then. ;D
Besides illegal peculiarities, there are numerous apps that offer legal automation, setting and backup options that work with read-only and write-only access. If you want to back up your data independently from the PC and Google Cloud, rooting is the solution. If you want to delete preinstalled apps, this is only possible with root access. Ad blockers that work throughout the system? Rooting!
But there are also disadvantages:
For the banking apps that don’t work with rooting, I came across a possible solution. More precisely, two solutions you can find in the initial post and in post number 8 of this thread on the XDA Developers forum. I’ll try both and come back to them in an upcoming article on my favourite root apps and modules.
To obtain root privileges, the bootloader on your Android smartphone must be unlocked. It’s responsible for loading the operating system into the memory when the device is started up. Furthermore, the installed Android version must support read and write permissions for the system (Vndklite Read-Write). I’ve already installed LeaOS for this exact purpose.
You also need an app that acts as a root manager and assigns administrator rights. This can be done with Magisk or SuperSU. If you’ve rooted your phone and are installing an app that wants root access, the root manager will ask you if you want to grant it. Then you can choose whether you want the app to have access temporarily, forever or never.
Although the developer has stopped working on SuperSU since 2018, there are still custom ROMs that have the root tool preinstalled. This is quite useful, as it eliminates the need for manual installation. The disadvantage of SuperSU is that not all root apps work with it. Therefore, I rely on Magisk, which I have to install myself.
For rooting with Magisk, I use a notebook and a USB cable. The smartphone drivers and Android Debug Bridge (ADB) must be present on your PC. ADB is included in the SDK Platform Tools and allows you to do various things with your smartphone using console commands. For example, installing an alternative OS or flashing a patched file that I need when rooting with Magisk. XDA Developers offers useful ADB instructions for Windows, Linux and macOS. This should make it possible to set up the tool.
I start my project by reading through the instructions for initial Magisk installation. Turns out I first have to find out if my smartphone has Ramdisk in the boot partition. To do this, I download the latest version of Magisk on GitHub and install the APK file on the smartphone.
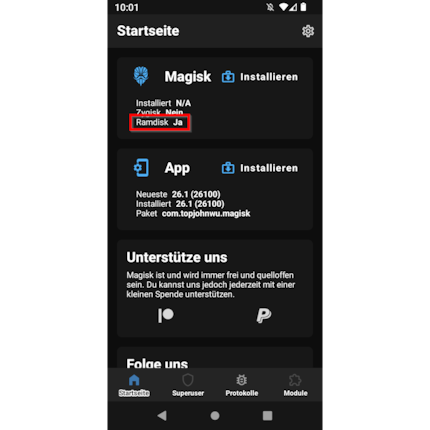
After starting Magisk, I see that a boot Ramdisk is indeed present. This means that I can root using patched boot.img. If there were no Ramdisk, I’d have to proceed with another patched file called recovery.img.
I get to the boot.img file by downloading the official Android firmware for my smartphone from the manufacturer and extracting the file with a packing program (WinRAR).
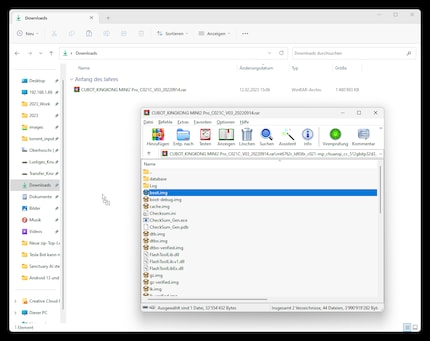
Now I need to know if my smartphone has a Vbmeta partition. Yep, there it is. I can tell because there’s a vbmeta.img in the KingKong Android image. I also unzip this file for later use. If you don’t see a corresponding file right away, the ADB command «adb shell ls -l /dev/block/by-name» can help. If «vbmeta», «vbmetaa» or «vbmetab» is listed in the resulting output lines, a corresponding partition exists.
Now I have everything I need to start rooting. There’s a boot Ramdisk as well as a vbmeta partition and I have the necessary .img files at hand.
I can only recommend my smartphone rooting technique using a computer if your smartphone doesn’t have Custom Recovery. Recovery mode works in parallel with Android as its own mini operating system that can be used for maintenance, installation and recovery. My smartphone is running the manufacturer’s Recovery. If I had a modded recovery system, such as TWRP, I could achieve root access in a simpler way. It should also be noted that the patch process is only necessary when Magisk is installed for the first time. Magisk updates can be done directly in the app later.
My path to rooting, with the manual at hand, continues as follows, summarised for convenience:
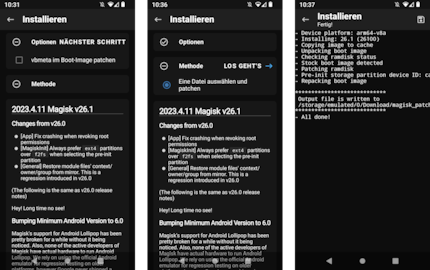
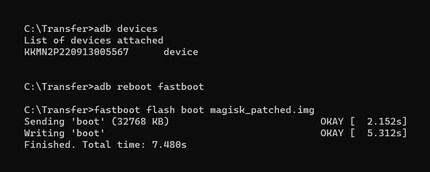
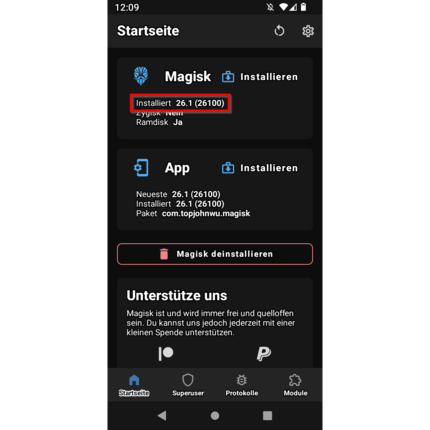
After rebooting, I go into the Magisk app and see that everything has been successfully installed.
To test if I actually have root access, I install the Root Checker app. Lo and behold; while letting the app check the root status, Magisk immediately asks me if I want to give the root checker administrator rights.
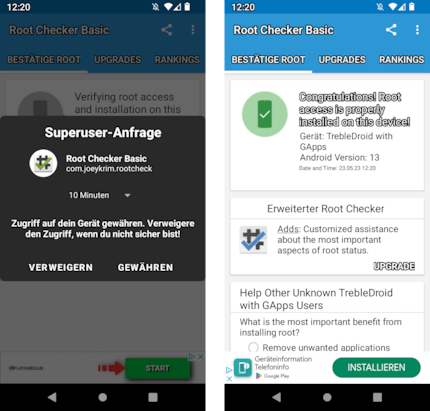
And the Root Checker celebrates a successful installation.
I’m happy, and immediately install my first new feature, a must-have moving forward. It’s a Magisk module called BlockADs. I’ll let you know soon how well it keeps ads off my display and what other root apps and modules I use with my smartphone.
Header image: Martin JudI find my muse in everything. When I don’t, I draw inspiration from daydreaming. After all, if you dream, you don’t sleep through life.